On This Page
Unified Checkout Implementation Quick Start Guide
Unified Checkout
Implementation Quick Start GuideThis quick start guide provides essential information and guidance for integrating
Unified Checkout
into your e-commerce system. The guide is written for
merchants who want to enable Unified Checkout
so that they can accept
payments on their e-commerce page. For more detailed information, see the .
Unified Checkout
Integration
GuideRecent Revisions to This Document
- Version 25.06.01
- Initial release of the guide.
Introduction to Unified Checkout
Unified Checkout
Unified Checkout
is a powerful and flexible payment solution that
simplifies the integration process and enhances the customer checkout experience. This
guide will help you get up and running with Unified Checkout
.Key Features
- Seamless integration with your existing e-commerce platform.
- Support for multiple payment methods.
- Customizable checkout flow.
- Enhanced security features.
- Responsive design for mobile and desktop.
Benefits
- Simplified integration process.
- Improved conversion rates.
- Reduced cart abandonment.
- Enhanced customer experience.
- Compliance with industry security standards.
Additional Information
For detailed information about .
Unified Checkout
and
the integration process, see the Unified Checkout
Integration
GuideGetting Started with Unified Checkout
Unified Checkout
This section outlines the steps to integrate
Unified Checkout
into your e-commerce system. Integration Prerequisites
Before getting started with the integration process, make sure you have:
- A validVisa Acceptance Solutionsmerchant account.
- A secure, PCI-compliant server environment.
- Access to theBusiness Center:
- Test:https://businesscentertest.visaacceptance.com
- Production:https://businesscenter.visaacceptance.com
- Accounts for the digital wallet payment methods you support.
Integration Steps
Integrating
Unified Checkout
into your e-commerce system involves these
main steps:- EnableUnified Checkout.
- Set up the server-side component.
- Set up the client-side component.
- ConfigureUnified Checkout.
- Test Your integration.
Each request sent to
Visa Acceptance Solutions
requires
specific header information. For details on constructing these headers, see the
Getting Started with REST Developer
Guide
.Optionally, you can capture the payment response through webhook notifications. For
information on webhook notifications for
Unified Checkout
, see the
Webhooks Support topic in the Unified Checkout
Developer Guide.You can use the payment details API to retrieve billing and shipping information
captured by
Unified Checkout
. Information that is captured by Unified Checkout
, including the billing and shipping address, can be
retrieved using the payment details API. For information about the Payment Details
API, see the Payment Details API section of the Unified Checkout
Developer
Guide.Payment Flow
Figure:
Unified Checkout
Payment Flow
Additional Information
For detailed information about .
Unified Checkout
and
the integration process, see the Unified Checkout
Integration
GuideStep 1: Enable Unified Checkout
Unified Checkout
To begin using , you must first ensure that your merchant ID (MID) is configured
to use the service and that any payment methods you intend to use are properly set up.
For detailed information about .
Unified Checkout
and
the integration process, see the Unified Checkout
Integration
Guide- Log in to theBusiness Center:Production URL:If you are unable to access this page, contact your sales representative.
- In theBusiness Center, go to the left navigation panel and choosePayment Configuration>Unified Checkout.
- You can configure various payment methods such as Apple Pay,Click to Pay, and Google Pay. ClickSet upand follow the instructions for your selected payment methods. When payment methods are enabled, they appear on the payment configuration page.You must configure payment methods you want to use for each transacting MID.
Figure:
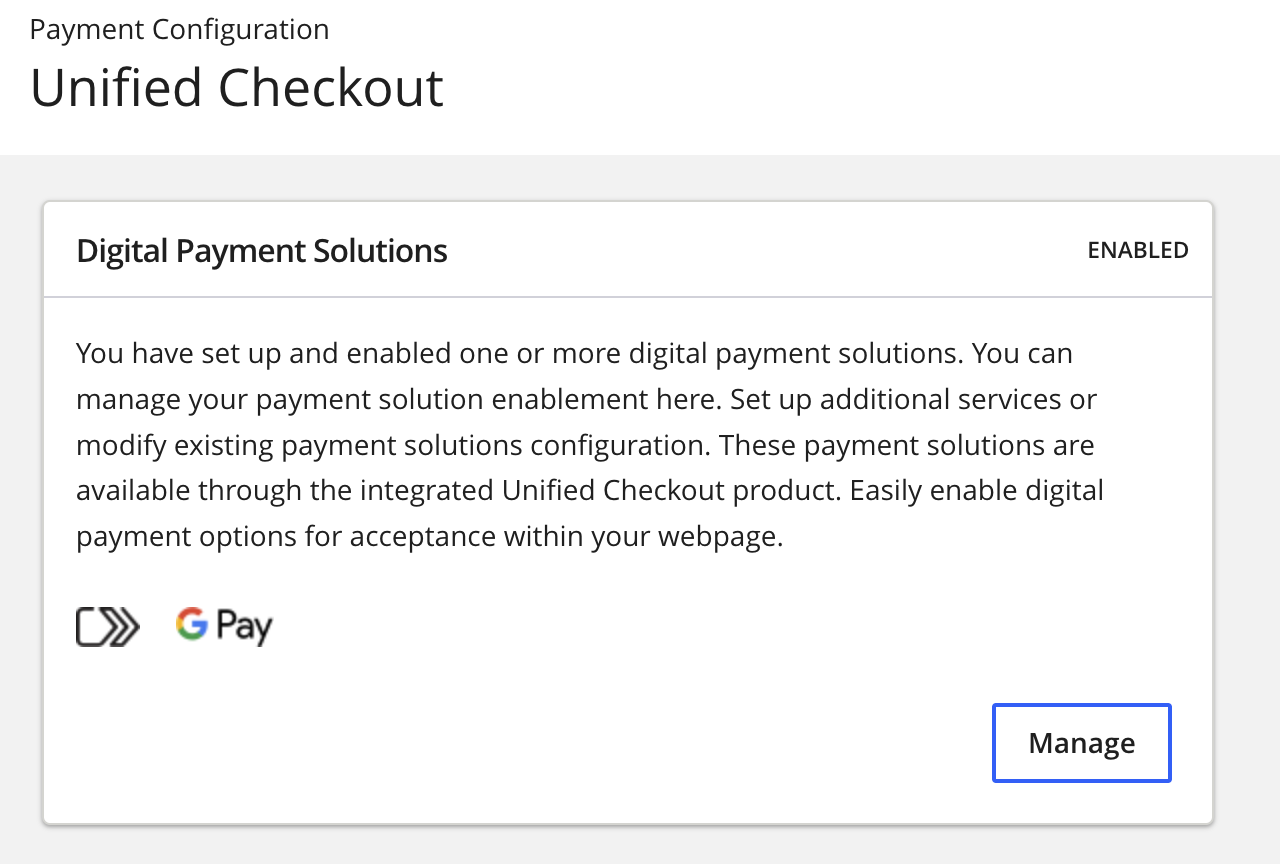
- ClickManageto edit your existing payment method configurations or enroll in new payment methods as they are released.
AFTER COMPLETING THE TASK
Proceed to Step 2: Set Up the Server-Side Component.
Step 2: Set Up the Server-Side Component
To initialize
Unified Checkout
within your webpage, you need to set
up the server-side component. This task involves making a server-to-server call to the
sessions API to authenticate your merchant credentials and establish how the Unified Checkout
front-end components will function.For detailed information about .
Unified Checkout
and
the integration process, see the Unified Checkout
Integration
Guide- Implement a server-to-server call to the sessions API.
ADDITIONAL INFORMATION
This call should include parameters that define howUnified Checkoutperforms. - Handle the response from the sessions API.
ADDITIONAL INFORMATION
The response will contain:- A transaction-specific public key for securing the transaction in the customer's browser.
- An authenticated context description package that manages the payment experience on the client side, including available payment options, interface styling, and payment methods.
- Store and manage the JSON Web Token (JWT) object, referred to as thecapture context.
ADDITIONAL INFORMATION
This JWT contains all the functions compiled from the sessions API response.
REST Example: Set Up the Server-Side Component
In this example, the
targetOrigins
and the
allowedPaymentTypes
fields define the target origin and the accepted
digital payment methods in your capture context. { "clientReferenceInformation": { "code": "TAGX001" }, "targetOrigins": [ "https://www.test.com" ], "clientVersion": "0.26", "allowedCardNetworks": [ "VISA", "MASTERCARD", "AMEX" ], "allowedPaymentTypes": [ "PANENTRY", "CLICKTOPAY", "GOOGLEPAY" ], "country": "US", "locale": "en_US", "captureMandate": { "billingType": "FULL", "requestEmail": true, "requestPhone": true, "requestShipping": true, "shipToCountries": [ "US", "GB" ], "showAcceptedNetworkIcons": true }, "orderInformation": { "amountDetails": { "totalAmount": "1.01", "currency": "USD" } }, "completeMandate": { "type": "CAPTURE", "decisionManager": true } }
AFTER COMPLETING THE TASK
Proceed to Step 3: Set Up the Client-Side Component.
Step 3: Set Up the Client-Side Component
To add the payment interface to your e-commerce site, you need to set up the
client-side component using the
Unified Checkout
JavaScript library. This setup
involves two primary components:- The button widget, which lists available payment methods for the customer.
- The payment acceptance page, which captures payment information from the cardholder. This can be integrated with your webpage or added as a sidebar.
For detailed information about .
Unified Checkout
and
the integration process, see the Unified Checkout
Integration
Guide- Load theUnified CheckoutJavaScript library.
ADDITIONAL INFORMATION
Include the library in your webpage's HTML. - Initialize the accept object with the capture context JWT.
ADDITIONAL INFORMATION
Use the JWT obtained from the server-side setup in Step 2. - Initialize the unified payment object with optional parameters.
ADDITIONAL INFORMATION
Configure the payment object according to your requirements. - Display the button list or payment acceptance page (or both).
ADDITIONAL INFORMATION
Choose the appropriate display method for your e-commerce site.
RESULT
The system will provide a transient token in response to user interactions. You can
use the transient token to retrieve the payment information captured by the UI by calling the
Payment Details API. For information about the Payment Details API, see the Payment Details
API section of the
Unified Checkout
Developer Guide.JavaScript Examples: Set Up the Client-Side Component
Setting Up with Full Sidebar
<html>
<head>
  <script
    src="[INSERT clientLibrary VALUE HERE]"
    integrity="[INSERT clientLibraryIntegrity VALUE HERE]”
    crossorigin=”anonymous"
  ></script>
</head>
<body>
  <h1>Unified Checkout Integration</h1>
  <input
    type="hidden"
    name="captureContext"
    value="[INSERT captureContext HERE]"
  />
  <script type="text/javascript">
    const sidebar = true;
    const captureContext = document.getElementById("captureContext").value;
const showArgs = { containers: {
paymentSelection: '#buttonPaymentListContainer',
}
};

    async function launchCheckout() {
      try {
        const accept = await Accept(captureContext);
        const up = await accept.unifiedPayments(sidebar);
        const tt = await up.show(showArgs);
        const completeResponse = await up.complete(tt);

        console.log(completeResponse); // merchant logic for handling complete response
      } catch (error) {
        // merchant logic for handling issues
        console.error("something went wrong: " + error);
      }
    }

    // Call the function
    launchCheckout();
  </script>
</body>
Setting Up with Embedded Component
The main difference between using an embedded component and the sidebar is that the
accept.unifiedPayments
object is set to false
, and the
location of the payment screen is passed in the containers argument.If you do not specify a location for the payment acceptance page, it
is placed in the side bar.
<html>
<head>
  <script
    src="[INSERT clientLibrary VALUE HERE]"
    integrity="[INSERT clientLibraryIntegrity VALUE HERE]”
    crossorigin=”anonymous"
  ></script>
</head>
<body>
  <h1>Unified Checkout Integration</h1>
  <input
    type="hidden"
    name="captureContext"
    value="[INSERT captureContext HERE]"
  />
  <script type="text/javascript">
    const sidebar = false;
    const captureContext = document.getElementById("captureContext").value;
    const showArgs = {
      containers: { paymentSelection: "#buttonPaymentListContainer",
paymentScreen:	'#embeddedPaymentContainer' }
    };

    async function launchCheckout() {
      try {
        const accept = await Accept(captureContext);
        const up = await accept.unifiedPayments(sidebar);
        const tt = await up.show(showArgs);
        const completeResponse = await up.complete(tt);

        console.log(completeResponse); // merchant logic for handling complete response
      } catch (error) {
        // merchant logic for handling issues
        console.error("something went wrong: " + error);
      }
    }

    // Call the function
    launchCheckout();
  </script>
</body>
AFTER COMPLETING THE TASK
Proceed to Step 4: Configure Unified Checkout.
Step 4: Configure Unified Checkout
Proper configuration ensures that your checkout process aligns with your business
needs and provides a smooth experience for your customers. This section outlines the
steps for configuring the basic
Unified Checkout
settings.For detailed information about .
Unified Checkout
and
the integration process, see the Unified Checkout
Integration
Guide- Select and configure the payment methods you support:
- Log in to theBusiness Centerand navigate to theUnified Checkoutconfiguration section.
- Select the payment methods you want to use:
ADDITIONAL INFORMATION
- Credit and debit cards
- Digital wallets
- Alternative payment methods
You must configure the payment methods you want to use for each transacting MID. - Configure the settings for each selected payment method.
AFTER COMPLETING THE TASK
Step 5: Test Your Unified Checkout Integration
After configuring
Unified Checkout
, it's crucial to thoroughly test
your integration to ensure it works correctly and provides a smooth checkout experience
for your customers. This section outlines the steps to test your Unified Checkout
integration. For detailed information about .
Unified Checkout
and
the integration process, see the Unified Checkout
Integration
Guide- Set up your test environment:
- Log in to theBusiness Centeraccount using your test credentials.
- Switch to the test environment if not already in test mode.
- Set up a test website or application that integratesUnified Checkout.
- Use test card numbers to simulate different payment scenarios.
ADDITIONAL INFORMATION
Here are some example test card numbers you can use:Common Card Test NumbersCard TypeCard NumberExpiration DateCard Verification NumberAmerican Express37828224631000503/20267890Mastercard555555555555444402/2026265Visa411111111111111112/2025123For more test payment data, see the Test Payment Details section of theUnified CheckoutDeveloper Guide. - Test different payment scenarios:
ADDITIONAL INFORMATION
- Successful transactions
- Declined transactions
- 3-D Secureauthentication, if applicable
- Different card brands
- Digital wallet payments, if configured
- Verify the capture context and token handling.
ADDITIONAL INFORMATION
Ensure that your integration correctly handles the capture context and transient tokens throughout the payment process. - Test error handling and edge cases.
ADDITIONAL INFORMATION
Simulate various error scenarios to ensure your integration gracefully handles and reports errors to the user. - Verify webhook notifications, if configured.
ADDITIONAL INFORMATION
If you set up webhook notifications, ensure that your system correctly receives and processes them for various transaction events.
AFTER COMPLETING THE TASK
After completing these testing steps, you should have confidence in your
integration. Remember to test in both the test and production environments before going
live.
Next Steps
Now that you have successfully set up and tested your
Unified Checkout
integration, here are some next steps to consider:- Move to Production:Once you're confident in your test results, update your integration to use production API credentials and endpoints.
- Monitor Transactions:Regularly review your transaction data in theBusiness Centerto ensure everything is functioning as expected.
- Optimize Your Integration:Analyze your checkout flow and consider ways to improve the user experience based on customer feedback and conversion rates.
- Stay Updated:Keep an eye on the documentation and release notes for any updates or new features related toUnified Checkout.
- Explore Advanced Features:Consider implementing additional services, such as Advanced Fraud Management or Token Management Service (TMS) to further enhance your payment processing capabilities.
- Seek Support:If you encounter any issues or have questions, do not hesitate to reach out to the support team or consult the comprehensive documentation.
By following these steps, you can ensure that your
Unified Checkout
integration continues to provide a smooth and secure payment experience for your
customers.Additional Resources
- API Reference tool and documentation:
- REST API Reference tool:experiment with API request/response examples, and code samples in a variety of popular languages. Visit index.html.
- : Visit index.html#unified-checkoutUnified CheckoutREST API Reference
- REST API Field Reference guide:provides descriptions and specifications for the REST API fields. Visit rest-api-fields-intro.html.
- Developer Portal:get access to SDKs, sample code, and integration tools. Visit CyberSource.
- Developer FAQs:provides answers to frequently asked questions about the REST API andBusiness Center. Visit faqs.html.
- Technical Support:contact our dedicated support team for assistance. Visit contact-us.html.