Enabling the eCheck Service During Boarding

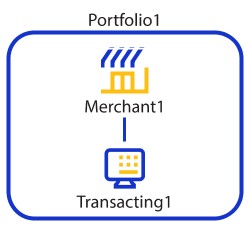
A merchant account includes at least two organizations: a merchant organization (parent) and a transacting organization (child). When boarding a merchant who will use eCheck, you must configure the transacting organization to self-enable eCheck.

Figure:

Merchant Account

Adding eCheck Self-Enablement During Boarding

Follow these steps to add eCheck self-enablement during boarding:
  1. Log in to the
    Business Center
    :

    ADDITIONAL INFORMATION

  2. In the left-navigation menu, choose
    Portfolio Management > Manage Merchants
    .
  3. In the Transacting Organization and Products section, click
    Start
    . The Transacting Organization and Products page opens.
  4. To enable the eCheck service in the Product Enablement section, click the
    Enablement
    drop-down menu and select
    Self-Enablement
    .
  5. To confirm the configuration, click
    Apply
    .
  6. To save all product configurations, click
    Save
    . You are returned to the Add Merchant page.
  7. To finish and return to Merchant Management or to add another merchant, click
    Return to merchant management
    .

Adding eCheck Self-Enablement to an Existing Merchant

Follow these steps to add eCheck self-enablement to an existing merchant:
  1. Log in to the
    Business Center
    :

    ADDITIONAL INFORMATION

  2. In the left-navigation menu, choose
    Portfolio Management > Manage Merchants
    .
  3. Search for the organization on the Manage Merchants page.
  4. Find the organization in the Search Results table and click the eye icon. The Merchant Details page opens.
  5. In the Products section, click
    + Add Products
    . The Add a Product page opens.
  6. Select
    eCheck
    .
  7. Select
    Self-Enablement
    .
  8. Click
    Add
    .
  9. Click
    Save
    .

Boarding a Merchant Account for Sandbox Testing

This topic describes how to begin to board a merchant account (MID) that the merchant user plans to use for testing eCheck transactions in the sandbox environment.
In order to perform this task, your partner portfolio must have eCheck enabled. If you do not know whether eCheck is enabled, contact your
Visa Acceptance Solutions
sales team.
For the final step of the task, you notify the MID user that they can complete the final steps to board their MID for use in the
Business Center
sandbox.
  1. Follow these steps to begin boarding a merchant account for sandbox testing:
  2. Log in to the Business Center sandbox as the portfolio user with administrative permissions:

    ADDITIONAL INFORMATION

  3. Using the Add Products section of the Merchant Management screen, enable eCheck for the merchant account (MID) as
    Allow Self-enablement
    .
  4. Notify the MID user that they can complete the steps to board their MID for sandbox testing:

    ADDITIONAL INFORMATION

    1. The MID user logs in to their MID user account on the sandbox Business Center.
    2. In the Available Products module, the MID user fills out the eCheck Application with test data for use in the sandbox testing environment.
    3. The MID user submits the application.
      When the application is submitted, the MID is automatically enabled for eCheck. The application does not go through underwriting because this merchant account is only used for test transactions.

    ADDITIONAL INFORMATION

    Merchants can find more information in the
    eCheck Merchant User Guide
    , under "Boarding Your Merchant Account for Sandbox Testing."